
Views: 0 Author: Site Editor Publish Time: 2026-10-22 Origin: Site


An indexing plunger that fails to lock can affect positioning accuracy, equipment operation, and operator safety. The cause may be a damaged pin, a weak spring, contamination, incorrect installation, or an unsuitable plunger design.
Before replacing the component, identify how the mechanism is supposed to operate. A non-locking model may return automatically when the handle is released, while a locking model may hold the pin in the retracted position. Understanding this difference helps prevent unnecessary replacements.
This guide explains the common causes of indexing plunger locking failure, how to troubleshoot the problem safely, and what to check when selecting a replacement.
An indexing plunger uses an internal spring to return the pin to its intended position. Repeated operation, corrosion, contamination, or unsuitable operating conditions may affect the mechanism over time.
A weak or damaged spring may prevent the pin from extending fully. However, sluggish movement does not always indicate spring failure. Dirt, misalignment, or a bent pin can also restrict movement.
To check the mechanism, retract and release the handle without applying side loads. Observe whether the pin moves smoothly and returns as intended. Compare its travel with the manufacturer's specifications.
If the pin fails to return, do not force it into position. Inspect the component and follow the manufacturer's service instructions. If the unit is not designed for internal repair, replace the assembly when necessary.
Dust, metal chips, machining residue, moisture, and chemical exposure can interfere with the movement of an indexing plunger. Contamination may accumulate around the pin or enter exposed areas of the housing.
Corrosion can increase friction between moving surfaces. Debris may also prevent the pin from completing its required travel, resulting in incomplete engagement with the receiving hole.
Inspect the exposed pin and surrounding mounting area for dirt, rust, scoring, or other visible damage. Clean the component using a method approved for its materials and design. Do not use aggressive solvents or lubricants unless the manufacturer confirms that they are suitable.
If the pin remains stuck or the internal mechanism shows signs of damage, stop using the assembly until the problem has been assessed.
An indexing plunger may fail to engage if its pin becomes bent, worn, or otherwise damaged. This can happen when the pin is subjected to excessive lateral loads or when components are forced into position without fully retracting the pin.
A deformed pin may bind inside the guide, preventing the spring from returning it to the intended position. Forcing the pin into the receiving hole can cause further damage.
Inspect the pin for visible bending, wear, or surface damage. If deformation is suspected, have its straightness checked using an appropriate inspection method. Do not continue operating a damaged component.
Before choosing a replacement, review the application's load conditions and the manufacturer's rated capacity. Replacing a failed pin with an identical part may not solve the problem if excessive loading caused the original failure.
Improper installation can restrict the internal movement of an indexing plunger. Excessive tightening, damaged mounting threads, cross-threading, or a distorted housing may cause binding.
Misalignment between the plunger and the receiving hole can also prevent full engagement. The pin may catch on the edge of the hole rather than entering it smoothly.
Check the mounting body, threads, fasteners, and surrounding fixture for visible damage. Verify that the component is installed according to the product drawing and specified tightening requirements.
Do not compensate for a poor fit by applying more force. Correct the mounting or alignment issue before returning the equipment to service.
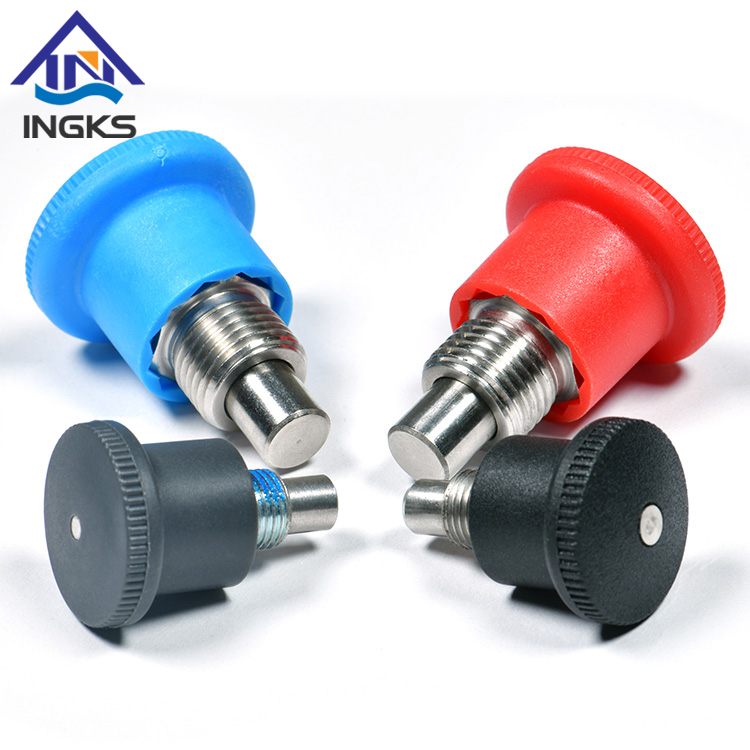
A common cause of confusion is selecting a plunger with the wrong locking function.
A locking indexing plunger may include a feature that holds the pin in the retracted position. The operator can activate this feature according to the model's operating instructions.
A non-locking model typically returns under spring force when the handle is released. It is not designed to remain retracted unless the operator continues to hold it.
Before diagnosing this behavior as a failure, check the model number and product documentation. Confirm whether the application requires a locking or non-locking design.
Review the available options in the INGKS indexing plunger product range to compare product designs and identify a suitable type.
The pin must reach the receiving hole to the required engagement depth. If the pin is too short, the mounting panel is too thick, or the mounting arrangement is incorrect, the pin may fail to engage fully.
Before replacing the component, measure the mounting panel thickness and check the available pin travel. Review the body dimensions, thread length, extended pin length, and required engagement depth against the manufacturer's drawing.
Also check the space available for the handle. Nearby panels or machine components must not obstruct the required pulling or turning motion.
Do not select a replacement based on thread size alone. Confirm the complete dimensional requirements to avoid repeating the original problem.
The receiving hole must be correctly positioned and sized for the selected pin. An undersized hole, burrs, damage, or misalignment can prevent smooth engagement. Excessive clearance may also affect positioning accuracy.
Inspect the hole and confirm its dimensions against the product drawing. Remove burrs and debris using an appropriate machining or maintenance procedure. Follow any specified entry chamfer or lead-in requirements.
Do not assume that one hole tolerance or chamfer angle is suitable for every indexing plunger. Use the requirements for the actual product and application.
Follow this sequence to identify the cause without creating additional damage.
Make the equipment safe. Stop the machine and secure moving components before inspecting the plunger. Remove any load that could cause unexpected movement.
Check the operating design. Confirm whether the model is intended to lock in the retracted position or return automatically.
Inspect the exposed pin. Look for visible bending, wear, corrosion, and contamination.
Check the mounting arrangement. Inspect the threads, housing, fasteners, and receiving hole for damage or misalignment.
Test movement without load. Retract and release the handle according to the manufacturer's instructions. Check whether the pin moves freely and returns correctly.
Review the original failure conditions. Consider excessive lateral loads, vibration, environmental contamination, and incorrect dimensions.
Replace or repair as specified. If the mechanism remains stuck or damaged, follow the manufacturer's service guidance before resuming operation.
Do not hammer the pin, force it into the receiving hole, or test the mechanism by exposing it to uncontrolled loads. These actions may worsen the damage or create a safety hazard.
Choose a plunger material that suits the operating environment. Moisture, cleaning chemicals, salt exposure, temperature, and abrasive contaminants can affect service life.
Zinc-plated steel may suit some dry indoor applications, while stainless steel may be appropriate where greater corrosion resistance is needed. The performance of stainless steel depends on its grade and the actual environment. Polymer components also vary in their resistance to heat, chemicals, and mechanical loads.
Confirm the material specifications for the selected model. Do not assume that one material is suitable for every washdown, marine, food-processing, or high-load application.
The handle design affects access, operating effort, and installation space.
Knob: A straightforward option for many manual positioning tasks.
Pull ring: May suit applications with restricted clearance around the handle.
Lever: Can provide convenient operation where the design and available space permit.
T-handle: May offer a larger gripping surface for manual operation.
These options are not interchangeable in every application. Check the product dimensions, required operating motion, available clearance, and user requirements before selecting a replacement.
If the original pin bent or sheared, investigate the cause before ordering another component. The replacement must suit the actual loading conditions, not just the existing mounting hole.
Consider the pin diameter, material, engagement depth, load direction, and whether the assembly experiences shock or repeated loading. Confirm the manufacturer's rated capacity for the selected model.
Do not rely on a generic pin-diameter table to determine safe load capacity. The actual capacity depends on the component design, material properties, support conditions, and application.
If the available mounting space limits the replacement options, review whether the fixture or load arrangement needs to be redesigned.
Regular inspection can help identify wear and contamination before they cause a locking failure.
Keep the exposed pin and mounting area clean.
Check the pin for wear, corrosion, or deformation.
Confirm smooth movement and proper spring return.
Inspect mounting threads and fasteners for loosening.
Verify that the receiving hole remains correctly aligned and undamaged.
Follow the manufacturer's maintenance and lubrication instructions.
Review the load conditions if the same failure occurs repeatedly.
Avoid using a lubricant, solvent, or cleaning method without confirming compatibility with the product materials and operating environment. Some components may have specific maintenance requirements.
For high-cycle or safety-critical applications, establish an inspection schedule based on operating frequency, environmental conditions, and the consequences of failure.
An indexing plunger that does not lock properly may have a damaged pin, a restricted mechanism, an installation problem, or an incorrect locking design. Begin with a safe inspection and confirm the component's intended operation before selecting a replacement.
Check the pin condition, mounting dimensions, receiving hole, material requirements, and rated capacity. If the same failure happens repeatedly, investigate the underlying load or alignment problem rather than replacing the component without further analysis.
Explore the INGKS indexing plunger product range to review available designs. Confirm the specifications and installation requirements for the selected model before returning the assembly to service.
Common causes include a damaged or bent pin, spring or internal wear, contamination, corrosion, misalignment, or an incorrect plunger design. Inspect the mechanism safely and confirm the model's intended operation.
A locking model may hold the pin in the retracted position using a dedicated lock-out feature. A non-locking model typically returns under spring force when the handle is released. Check the product documentation to confirm the design.
A bent or damaged pin should not be forced back into position or returned to service without an appropriate assessment. Follow the manufacturer's repair guidance or replace the component when required.
Check the mounting dimensions, pin length, locking function, material, handle clearance, and rated capacity. Investigate why the original component failed before choosing a replacement.
Keep the mechanism clean, inspect the pin and mounting hardware, verify alignment, and follow the manufacturer's maintenance instructions. Review the loading conditions if failures recur.


