
Views: 0 Author: Site Editor Publish Time: 2026-10-21 Origin: Site


A quick release pin is designed for fast, convenient assembly and disassembly. When it gets stuck, however, maintenance can become difficult and equipment downtime may increase.
Common causes include corrosion, contamination, side loading, misalignment, surface damage, and failure of the internal locking mechanism. Identifying the cause is essential before attempting removal.
Safety comes first: Stop the equipment, secure the connected components, and follow the applicable maintenance procedure before working on a stuck pin. Never force a pin out of an assembly that is still carrying an uncontrolled load.
In this guide, we explain why quick release pins get stuck, how to approach the problem safely, and how to choose a suitable replacement.
Table of Contents
Quick release pins use different locking designs, including spring-loaded detents and ball-lock mechanisms. Dirt, corrosion, mechanical loads, or damaged components can interfere with normal operation.
Moisture, salt, chemicals, and outdoor exposure can cause corrosion on a pin or inside its receiving hole. Corrosion products may increase friction and make removal difficult.
Dust, sand, metal particles, and other debris can also interfere with the movement of internal components. In push-button ball-lock pins, contamination may prevent the locking balls or internal spindle from moving freely.
Dissimilar metals can experience galvanic corrosion when they are electrically connected in the presence of an electrolyte. The extent of corrosion depends on the materials and environmental conditions.
What to check:
Visible rust, deposits, or discoloration.
Dirt around the pin shaft or receiving hole.
A button or release mechanism that moves abnormally.
Environmental exposure that may require a different material or protective finish.
A pin may become difficult to remove when the connected components press against its shaft. This can happen when the joint carries a load, the bracket is misaligned, or the surrounding structure has deformed.
A bent pin can bind against the hole wall even after the external load has been removed. Pulling harder may damage the handle or the connected equipment.
Do not assume that every stuck pin is bent. Inspect the assembly and determine whether the load, alignment, pin condition, or receiving hole is responsible.
Galling is a form of adhesive wear that can occur when metal surfaces slide against each other under pressure. Material may transfer between the surfaces, creating rough areas, raised metal, or burrs.
Some material combinations are more susceptible to galling than others. Surface finish, lubrication, contact pressure, and the fit between the pin and receiving hole can all affect the risk.
If the shaft or hole has visible scoring, raised material, or other damage, stop repeated removal attempts. The damaged components may require inspection or replacement.
Quick release pins should enter aligned holes without excessive force. If the holes are offset, the pin may catch on an edge or become wedged between the connected parts.
Forcing a pin into a misaligned joint can damage the shaft, deform the hole, or create burrs that make later removal more difficult.
Before insertion, confirm that the connected components are correctly positioned and supported. Use the equipment manufacturer's approved alignment method rather than forcing the pin into place.
A ball-lock pin may fail to release if its button, spring, spindle, or locking balls are damaged or obstructed. A detent pin may also become difficult to operate if its spring-loaded mechanism is worn or contaminated.
Possible warning signs include:
The button does not move normally.
The locking balls do not retract as intended.
The release mechanism feels loose or unresponsive.
The pin no longer locks securely after insertion.
Do not rely on a pin with a damaged or unreliable locking mechanism. Remove it from service and follow the manufacturer's inspection or replacement guidance.
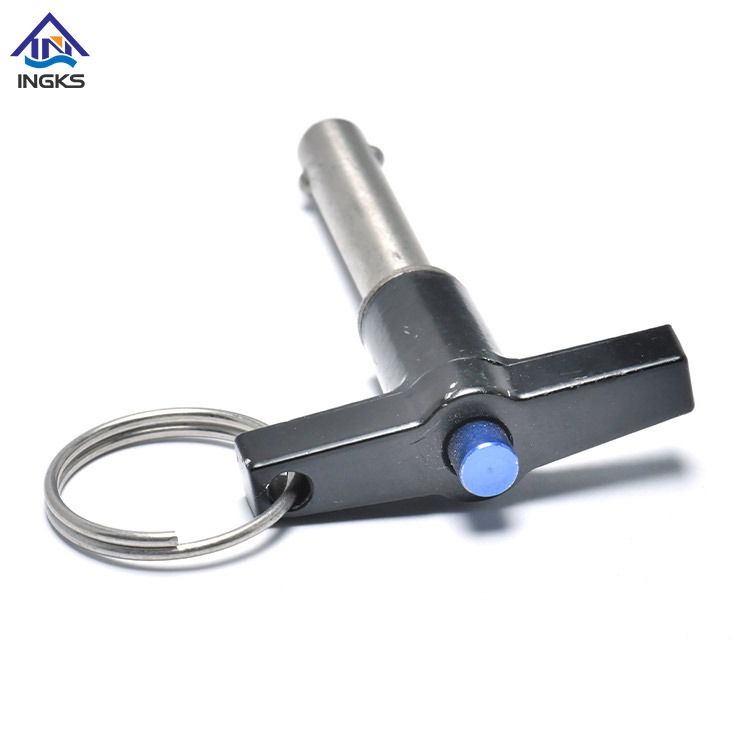
Example: A ring button handle quick release ball lock pin. View the INGKS Quick Release Pin product range.
The correct removal method depends on why the pin is stuck, the equipment design, and the consequences of disturbing the joint. Start with a safety assessment instead of immediately applying more force.
Stop the equipment and follow the applicable lockout and isolation procedure. Secure moving components and support the joint as specified by the equipment manufacturer.
A pin may be carrying a load even when the equipment appears stationary. Do not remove it until the load and movement risks have been assessed and controlled.
Keep hands away from pinch points and do not work beneath unsupported components.
Where the equipment procedure permits, adjust or support the connected components to relieve pressure on the pin.
Check whether the holes are aligned and whether the surrounding bracket or receiver has moved or deformed. Do not use an improvised lever or pull harder against a joint that may still be under load.
If the pin remains trapped, or if releasing it could cause a component to move suddenly, stop and seek qualified maintenance support.
Check the accessible parts for rust, debris, visible bending, burrs, handle damage, or abnormal button movement.
If the release mechanism does not operate as intended, do not assume that pulling on the handle will retract the locking balls. The mechanism may be damaged or obstructed.
Compare the pin with the manufacturer's product information or drawing when available. This helps identify the locking design and the appropriate maintenance procedure.
If corrosion is suspected and the equipment procedure permits it, an approved penetrating product may help loosen corrosion at accessible interfaces.
Follow the product instructions and allow the recommended application time. Check compatibility with seals, plastics, coatings, and nearby components before applying any chemical.
A penetrating product cannot repair a bent shaft, damaged hole, or failed internal mechanism. If the pin remains stuck, do not keep repeating the same treatment without reassessing the cause.
Do not use excessive pulling force, uncontrolled hammering, a torch, or drilling as general-purpose removal methods. These actions can damage the pin, receiver, heat-treated parts, nearby components, or the surrounding structure.
Destructive removal should be performed only by qualified personnel using an approved procedure for the specific equipment. The procedure must account for structural integrity, stored energy, nearby services, and the risk of damaging the receiving hole.
After removal, inspect the pin and the mating components before returning the equipment to service. Replace damaged parts and verify that the locking mechanism operates correctly.
Replacing a stuck pin with an unsuitable model can allow the same problem to recur. Select the replacement according to the actual joint design, operating conditions, and verified product specifications.
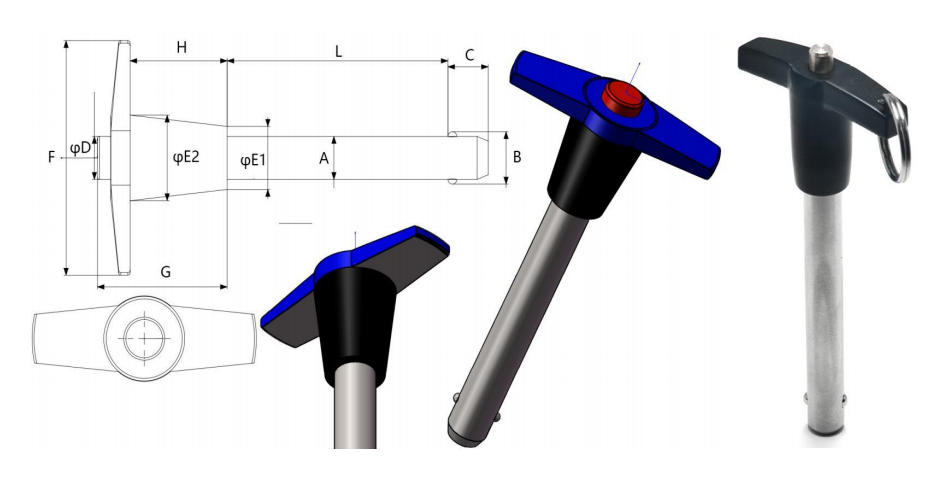
The pin diameter must suit the receiving hole and the required fit. The grip length must accommodate the thickness of the connected components according to the manufacturer's dimensional drawing.
Do not select a longer or shorter pin based on appearance alone. An incorrect fit may affect engagement, movement, or the intended locking function.
Consider moisture, salt exposure, chemicals, temperature, wear, and the required mechanical performance.
Stainless steel, carbon steel, and other alloys have different properties. Actual performance depends on the precise grade, heat treatment, finish, design, and service conditions.
Do not assume that a material label alone establishes a pin's load capacity or corrosion resistance. Confirm the exact specification with the manufacturer.
Check the manufacturer's rated loads and the intended installation conditions. Relevant factors may include pin diameter, material, heat treatment, the number of shear planes, support conditions, load direction, and the connected components.
Do not apply a universal safety factor or divide a load evenly between shear planes without validating the actual joint design. For safety-critical equipment, use the applicable engineering standard and qualified design review.
Choose a locking mechanism that suits the application and required retention. Ball-lock pins and detent pins do not provide identical locking behavior, so they should not be treated as interchangeable without checking the design requirements.
The handle should fit the available space and allow the intended operating method. Handle shape alone does not determine the pin's strength or suitability.
Explore INGKS Quick Release Pins to compare available designs. For a specific example, see the INGKS Ring Button Handle Quick Release Ball Lock Pin.
Check the manufacturer's drawing for the actual dimensions and reference points before confirming a replacement.
Preventive maintenance helps identify wear and operating problems before they cause equipment downtime.
Inspect regularly: Check for corrosion, scoring, deformation, loose handles, and damage to the locking mechanism.
Keep components clean: Remove contamination using a method compatible with the pin and equipment.
Use approved lubrication: Follow the manufacturer's instructions for lubricant type, quantity, and application frequency.
Check alignment: Confirm that mating holes align and that the pin enters without excessive force.
Avoid overload: Use the pin within its rated limits and inspect the joint if an overload or impact occurs.
Replace damaged pins: Do not return pins with bent shafts or unreliable locking mechanisms to service.
Review the specification: If sticking happens repeatedly, reassess the fit, material, locking design, environment, and actual loading conditions.
A quick release pin can get stuck because of corrosion, contamination, side loading, misalignment, surface damage, or a failed locking mechanism. The safest response is to secure the equipment, identify the cause, and follow an approved removal procedure.
If the pin remains stuck or the joint may still carry a load, stop rather than forcing it out. Inspect the pin and receiving hole after removal, and choose a replacement based on verified dimensions, material properties, locking requirements, and load ratings.
For suitable replacement options, explore the INGKS Quick Release Pin range.
Common causes include corrosion, dirt, side loading, misalignment, surface damage, and a faulty internal locking mechanism.
Stop and secure the equipment, control any load, inspect the pin, and follow the manufacturer's removal procedure. Do not force a pin out of an unstable or loaded joint.
An approved penetrating product may help with accessible corrosion if it is compatible with the assembly. It will not fix a bent pin or a failed locking mechanism.
Not as a general troubleshooting step. Heat and drilling can damage the equipment or compromise structural integrity. Destructive removal requires a qualified person and an approved procedure.
Inspect and clean the pin regularly, use only approved maintenance products, check alignment, avoid overload, and replace damaged pins. Repeated sticking may indicate an incorrect fit or unsuitable specification.


